
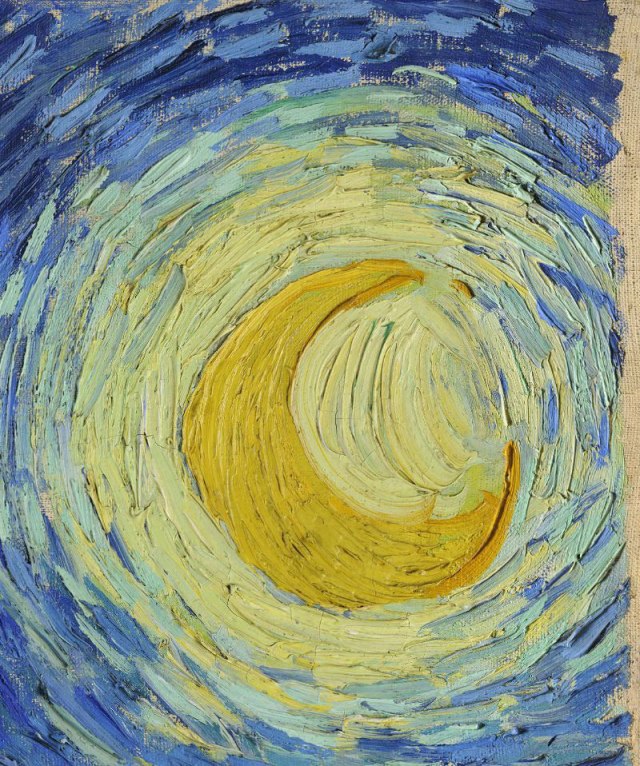
What is the Starry Signs BOM?
The Starry Signs Block of the Month (BOM) is a twelve-part quilting series released throughout 2025. Each month, participants receive a downloadable PDF pattern for a single quilt block representing one of the twelve zodiac constellations. This structured release allows quilters to build a cohesive celestial quilt gradually, turning a complex project into manageable monthly tasks.
The design centers on the Starry Signs theme, where each block captures the unique geometry of a specific star sign. From the sweeping lines of Scorpio to the balanced symmetry of Libra, the patterns are designed to work together as a unified whole. The project appeals to those who enjoy the meditative pace of monthly quilting while creating a piece with astronomical significance.
One of the strongest features of the Starry Signs BOM is the flexibility in assembly. While the blocks are designed to form a standard quilt top, the patterns include bonus arrangements and border options. This means you can display the constellations in a traditional grid or experiment with layouts that highlight specific zodiac pairings, making the final quilt a personal interpretation of the night sky.

Gather Your Supplies
Before you cut the first piece of fabric, organize your workspace and materials. The pattern relies on precise geometry, so having the right tools on hand prevents frustration later. This guide focuses on the essentials for foundation paper piecing (FPP) and fabric selection.
Essential FPP Tools
Foundation paper piecing requires specific tools to handle the paper backing and fine stitching. You will need a sharp rotary cutter, a clear acrylic ruler, and a self-healing cutting mat. For the piecing itself, use a quarter-inch presser foot and a walking foot to manage the multiple layers of fabric and paper. A fine-point sharp (size 70/10) sews cleanly through the paper without breaking needles.
Fabric Selection
The quilt features twelve constellation blocks, each requiring a distinct color palette. Choose fabrics that offer strong contrast between the background and the constellation stars. Solid or low-volume prints work best for the background to let the star shapes pop. For the stars, use fabrics with enough texture or color to stand out against the night sky backdrop. Pre-wash your fabrics to remove any excess dye that might bleed during the final quilt assembly.
Sew the first constellation block
Foundation paper piecing (FPP) is the backbone of the Starry Signs quilt, allowing you to create sharp, intricate celestial shapes that standard patchwork struggles to replicate. The first block sets the standard for the entire year, so precision here pays off in the final assembly. You are not just sewing fabric; you are mapping a constellation.
Think of the foundation paper as the skeleton and the fabric as the skin. The paper holds everything in place while you build the block layer by layer. If the skeleton is crooked, the skin won't fit. This method demands a quarter-inch seam allowance, consistently. A deviation of even an eighth of an inch can throw off the alignment of subsequent patches, turning a crisp star into a wobbly blob.
Start by printing the foundation pattern for Block 1. Check your printer settings to ensure the test square measures exactly one inch. If it doesn't, adjust your DPI or scale settings before cutting. Accuracy begins with the paper.

Place your first fabric piece right-sides together with the foundation sheet, covering the area labeled "1" with at least a quarter-inch margin beyond the seam lines. Pin or baste it in place. This initial placement is critical because it determines the block's orientation. Use a quarter-inch presser foot or mark your needle plate to ensure your seam allowance is exact.
Sew directly on the printed seam line for area 1. Flip the foundation sheet over and trim the excess fabric to a quarter-inch seam allowance. Press the fabric flat against the paper. Do not press too hard with a hot iron, as this can scorch the paper or melt synthetic fibers; a gentle press from the back of the paper is usually sufficient.
Place your second fabric piece right-sides together with the foundation, covering area "2" and overlapping the first patch by at least a quarter-inch. The overlap is where the magic happens; it ensures there are no gaps when you press the seam open or to one side. Pin it securely, focusing on the overlap area to prevent shifting.

Sew on the seam line between areas 1 and 2. Flip, trim, and press. Repeat this process for each subsequent patch. With each new layer, you are building the shape of the constellation. Keep your scissors sharp; dull blades will fray the edges of your small, intricate star points. Trim close to the seam line, but never cut into the stitching.
Once all patches are sewn, trim the outer edges of the block according to the pattern instructions, leaving a quarter-inch seam allowance beyond the outermost seam lines. Remove the foundation paper carefully. Tear the paper away from the seam lines, working slowly to avoid pulling the stitches. If the paper resists, use a seam ripper to gently loosen the threads near the tear line.
The final step is pressing the entire block from the back to smooth out any wrinkles created by the paper removal. Your first Starry Signs block is now complete. Treat this block as your practice run; the next blocks will follow the same rhythm, but the shapes will become more complex. Keep your seam allowances strict, and your quilt will align perfectly.
Avoid common BOM quilting mistakes
A Block of the Month project is a marathon, not a sprint. The Starry Signs quilt demands consistency across twelve months, and small errors compound quickly into a warped final result. By addressing the most frequent pitfalls upfront, you protect your progress and ensure the constellation blocks align perfectly when the time comes to assemble the top.
Cut with precision
Accuracy begins at the cutting mat. A quarter-inch deviation in each block adds up to inches of error by the end of the year. Use a rotary cutter with a sharp blade and a clear acrylic ruler. Check your ruler’s alignment before every single cut. If your pattern includes star points, trim them exactly as specified; even a slight rounding of points will make the stars look soft rather than sharp.
Don’t skip prewashing
Fabric dye can bleed, especially with the dark blues and blacks often used in starry night themes. Prewashing your fabrics prevents color transfer that can dull your carefully chosen palette. If you cannot prewash, ensure your fabrics are colorfast by testing a scrap in warm water. This step is non-negotiable for maintaining the clarity of your celestial design.
Improve your lighting
Quilting is a visual task. Working in dim light leads to misaligned seams and missed stitches. Set up a dedicated sewing station with bright, neutral-toned LED lighting. Good illumination helps you see the grain lines of the fabric and spot tiny imperfections in your stitching. It also reduces eye strain during those long, focused sessions required for precise piecing.
Organize as you go
It is easy to lose track of which block belongs to which month. Create a designated storage area for each month’s project. Use labeled bins or drawers to keep finished blocks, leftover pieces, and patterns together. This system prevents confusion and makes it easy to reference previous months if you need to match fabric shades or adjust seam allowances.
Sew a test strip and measure the seam allowance. Adjust your needle position or presser foot pressure until it is exactly one-quarter inch.
Press seams open or to the side as directed. Use a pressing cloth if your fabric is delicate to avoid shine or scorching.
Measure each completed block before setting it aside. Ensure it matches the pattern’s final dimensions to guarantee alignment later.
Arrange your layout
One of the best parts of the Starry Signs block of the month is the freedom to rearrange your 12 constellation blocks. You aren't locked into a single grid; the design supports over 10 different variations, letting you build a quilt top that feels personal. Think of your blocks like stars in the night sky—you can shift them to create new constellations.
Start by laying out your finished blocks on a large floor space or design wall. Try a classic grid for a balanced look, or offset the rows to mimic the irregular sparkle of a starry field. You can also group similar colors together to create a gradient effect, or scatter them randomly for a modern, abstract feel. The goal is to find a composition that excites you before you sew anything together.
Compare layout options
Not sure where to start? Here is a quick comparison of popular Starry Signs arrangements to help you decide.
| Layout Style | Visual Effect | Best For |
|---|---|---|
| Classic Grid | Structured and orderly | Traditional quilt aesthetics |
| Offset Rows | Dynamic and flowing | Adding movement to the design |
| Scattered | Modern and abstract | A contemporary, non-traditional look |
| Center Focus | Symmetrical with a focal point | Highlighting a specific constellation |
Finalize your composition
Once you have a layout you love, pin or tape the blocks in place to test the flow. Check that the seams align well and that the contrast between blocks is pleasing. When you are ready, sew the blocks into rows, then sew the rows together. Press your seams carefully to keep the quilt top flat and ready for batting.
Watch the sew along
Visual guidance makes the Starry Signs block of the month pattern easier to follow. Watching the stitching process helps you catch timing details that written instructions might miss.
Sheri from Whole Circle Studio walks through the full sequence in her official tutorial. The video shows how to handle the celestial motifs and align the star points correctly.
Follow along step by step to keep your seams accurate.

Start by watching the entire video once. This gives you a clear picture of the final block before you cut any fabric.

Pause the video when Sheri moves from piecing to pressing. Note how she arranges the star points to ensure the celestial pattern aligns.
Follow the on-screen stitching lines. Use a quarter-inch presser foot to keep your blocks consistent with the tutorial.
Frequently asked questions about the Starry Signs quilt
Here are the most common questions we see about the Starry Signs block of the month project, covering fabric choices, organization, and common pitfalls.
No comments yet. Be the first to share your thoughts!