
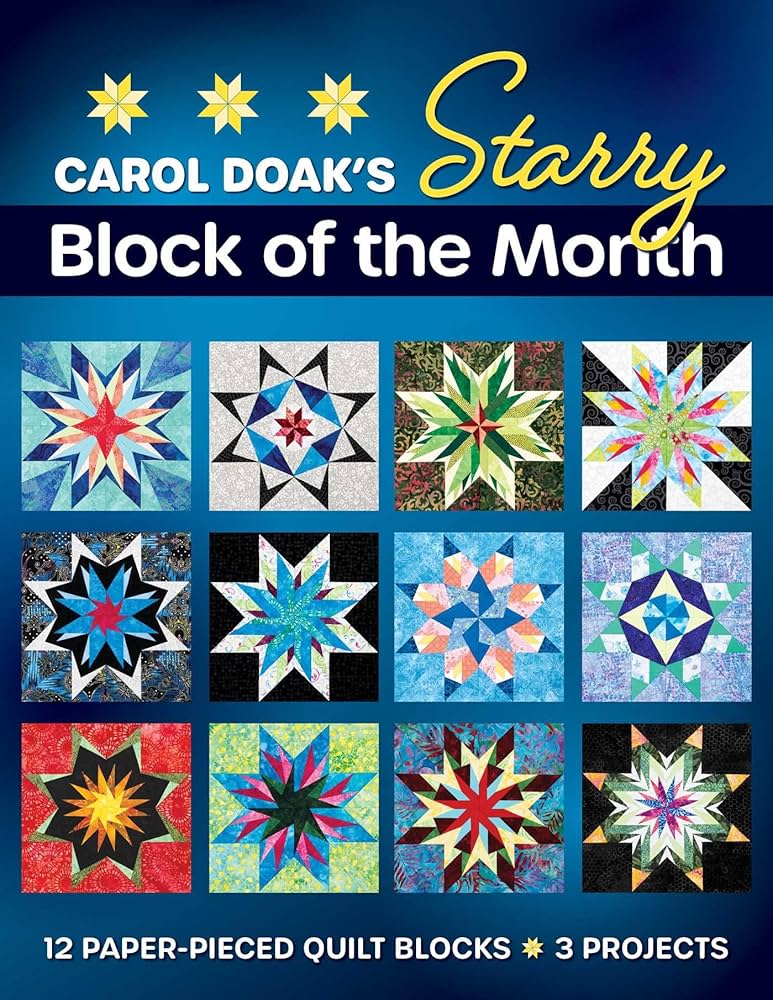
Start with the Starry Signs foundation
The Starry Signs quilt pattern by Whole Circle Studio transforms complex constellation shapes into manageable, precise blocks. While the final design resembles a starry night sky, the construction relies on foundation paper piecing (FPP), a technique that prioritizes accuracy over traditional free-motion cutting. This method is essential for handling the sharp angles and tight points characteristic of astronomical figures without losing fabric integrity.
Foundation paper piecing works by sewing fabric directly onto a printed paper template. You place each piece in sequence, following the numbered or lettered zones on the foundation sheet. This approach ensures that every seam aligns perfectly, which is critical when piecing together the intricate lines of stars and constellations. Without this structural guide, the small, angled pieces often shift, resulting in distorted shapes that break the celestial illusion.
To begin, print the foundation sheets on standard paper. Cut your fabric slightly larger than the designated zones. As you sew, press the seams open or to one side immediately after stitching to keep the block flat. The precision of FPP means you can trust the paper template to hold the geometry steady while you build the quilt top block by block.
Prepare fabrics for constellation blocks
The foundation of the Starry Signs quilt is the relationship between the background and the star shapes. Because you are using foundation paper piecing (FPP), the fabric choices must support precise seams and high contrast. A low-contrast background will make the constellation lines disappear, while a busy print can compete with the geometric star points.
Choose a dark, solid background
Select a solid fabric for the background that is significantly darker than your star fabrics. This darkness acts as the night sky, allowing the lighter star shapes to pop. Avoid fabrics with large-scale prints or heavy textures in the background areas; these can distract from the delicate constellation lines you are stitching. A deep navy, charcoal, or black solid works best for most kits.
Select high-contrast star fabrics
For the stars themselves, choose light or medium-weight solids that contrast sharply with your background. The goal is to ensure every point of the constellation is clearly visible. If you are using a pre-selected kit, the included fabrics are already curated for this contrast. If you are mixing and matching, test your fabric pairings under natural light to confirm the difference in value.
Organize and cut your materials
Lay out your selected fabrics before cutting. For FPP, accuracy is more important than speed. Cut your background squares slightly larger than the pattern requires to allow for trimming after sewing. Keep your star fabrics organized by constellation block to avoid confusion during the piecing process. Having everything prepped and within reach will streamline the FPP workflow.


As an Amazon Associate, we may earn from qualifying purchases.
Piece the first constellation block
The pattern uses foundation paper piecing (FPP) to create precise, star-shaped blocks. This method allows for sharp points and accurate alignment of the constellation shapes, which is difficult to achieve with traditional piecing. We will start with the first block of the year. While the specific constellation changes annually, the technique remains consistent.
Gather your fabric scraps, coordinating background fabric, and the printed foundation paper for Block 1. Ensure your rotary cutter, ruler, and pressing tools are within reach. The foundation paper contains the stitch lines and block numbers. Lay the first piece of paper stitch-side up. The printed lines should be visible through the paper.

Place your first fabric piece right-sides together on the back of the foundation paper, covering the entire area labeled "1". Stitch 1/4 inch away from the printed line on both sides of the seam allowance. Flip the paper over and trim the excess fabric, leaving a 1/4 inch seam allowance around the stitched lines. Press the fabric flat.
Continue adding fabric pieces one by one, following the numbered sequence on the foundation. Place each new piece right-sides together with the previously sewn fabric, aligning the edge. Stitch along the next printed line, flip, and trim. This layering process builds the constellation shape. Keep the fabric taut but not stretched to prevent distortion.
Once all pieces are sewn, press the entire block carefully to set the seams. Trim the excess paper and fabric around the outer edge, leaving a 1/4 inch seam allowance outside the outermost stitch line. This ensures the block will align perfectly with adjacent blocks in the final quilt top.
Mastering this FPP sequence ensures your Starry Signs quilt maintains its geometric integrity. Each block is a standalone unit that contributes to the larger celestial map. Proceed to the next block using the same disciplined approach.
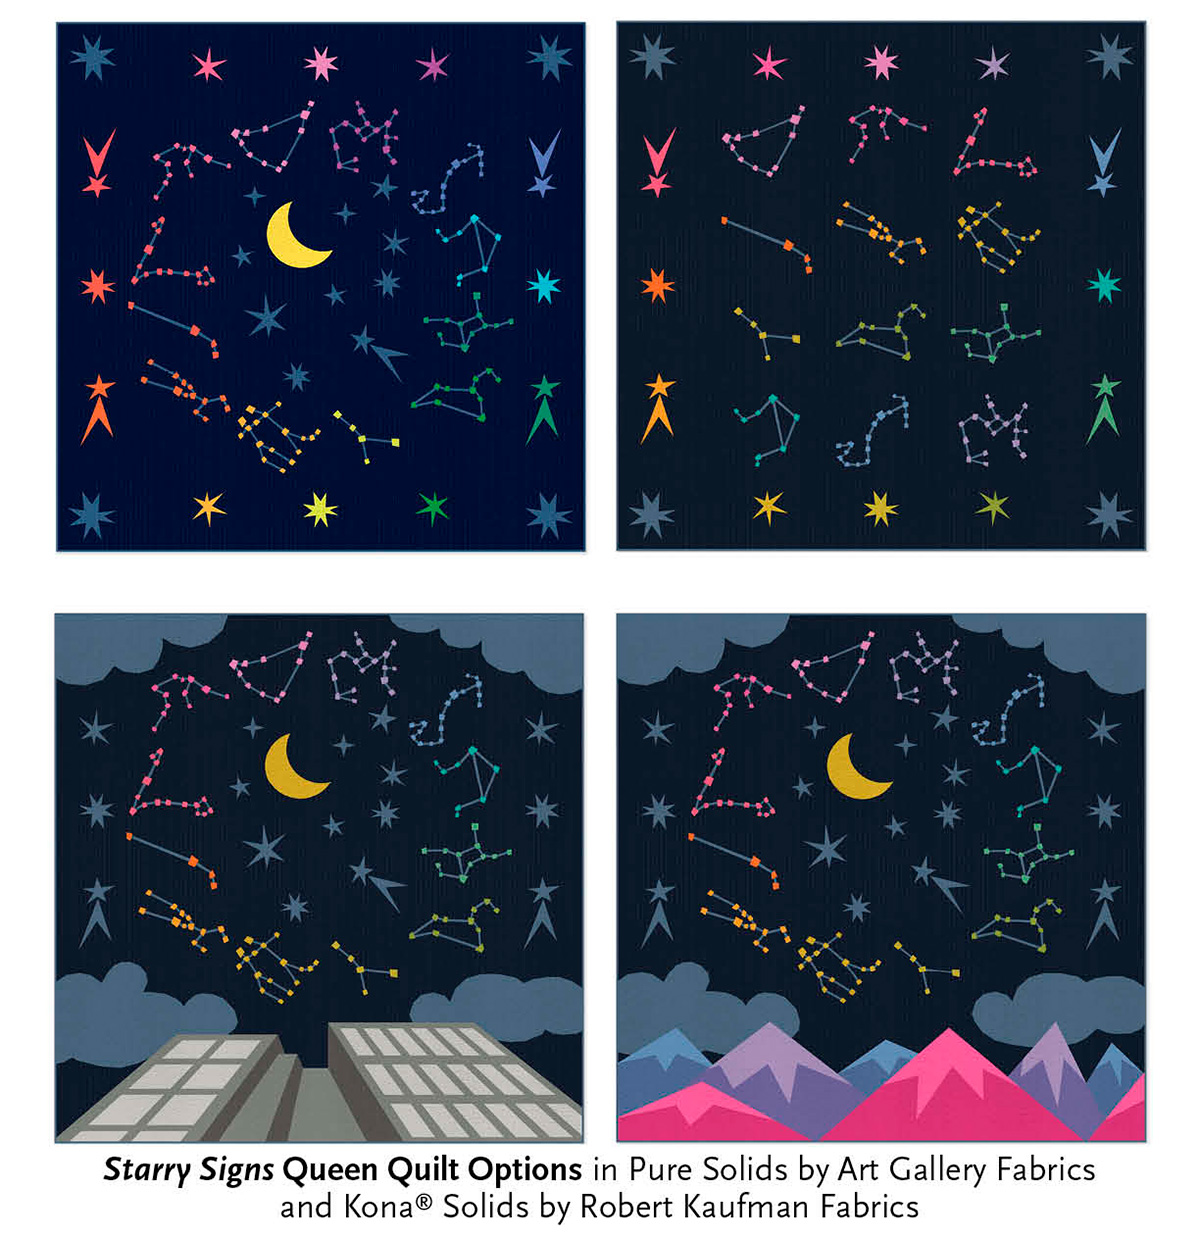
Assemble the 12 block variations
Whole Circle Studio’s Starry Signs pattern is designed to be flexible, offering over ten distinct layout options for your twelve zodiac blocks. Once you have sewn your constellation blocks using foundation paper piecing, the next step is arranging them into a cohesive quilt top. You can choose a traditional grid for a classic look, or opt for a diagonal setting to mimic the scattered nature of a night sky.
The visual impact of your quilt changes significantly based on the layout you select. A standard grid creates a structured, orderly appearance, while a diagonal arrangement adds dynamic movement. Some layouts also incorporate sashing or borders to highlight the individual constellations. Review the comparison below to decide which style best fits your fabric choices and space.
| Layout Style | Visual Impact | Assembly Difficulty | Border Requirement |
|---|---|---|---|
| Standard Grid | Structured and orderly | Low | Optional |
| Diagonal | Dynamic and scattered | Medium | Recommended |
| Pinwheel | Rotational movement | Medium | Required |
| Staggered | Organic and flowing | High | Optional |
Watch a Starry Signs block tutorial
Free-motion piecing (FPP) requires steady hands and precise stitching, which can be difficult to master through text alone. Watching the process in motion helps you understand how to layer the fabric and guide the needle through dense, multi-point shapes.
The following video demonstrates Quilt Block 7 from the Whole Circle Studio series, focusing on the Cancer constellation. This bonus tutorial walks through the specific FPP techniques needed to align the star points and manage the seam allowances for a clean finish.
Check your star alignment
Before you commit to binding the Starry Signs quilt, take a moment to verify the geometry of your 12 constellation blocks. Because this pattern relies on foundation paper piecing (FPP), slight shifts in seam allowance or block placement can cause the zodiac symbols to skew or the overall quilt top to become a parallelogram instead of a square. A quick quality check now saves you from unpicking stitches later.
Use this checklist to ensure your Starry Signs quilt top is ready for the final stage:
-
Verify 1/4-inch seam allowances on all FPP units
-
Align point-to-point intersections on all constellation blocks
-
Measure diagonal lengths to confirm squareness
-
Press seams open or to one side consistently
-
Trim any loose threads that might interfere with binding
Once you are satisfied with the block integrity, use the following visual guide to double-check your alignment before moving forward.
Lay your quilt top flat and measure from corner to corner. If the diagonal measurements differ by more than 1/4 inch, your quilt is out of square. Gently steam press the blocks, adjusting the alignment until the diagonals match.
Examine the points of each zodiac symbol. They should meet precisely at the seams. If points are rounded or misaligned, trim the excess fabric carefully with sharp scissors to sharpen the constellation shapes before assembly.
Measure the width and height of the entire quilt top. Ensure all rows are equal in length. If one row is shorter, check for uneven seam allowances or stretched fabric during pressing.
Common starry signs: what to check next
Before you cut your first fabric square, it helps to know the basics of the Starry Signs pattern by Whole Circle Studio. This section covers the most frequent questions about paper sizes, fabric requirements, and how to customize the layout.
What paper size is used for foundation paper piecing?
The Starry Signs pattern uses standard 8.5" x 11" letter-sized paper for the foundation pieces. This makes it easy to print at home without needing special equipment. The pattern instructions include clear guidelines on how to arrange these pages for efficient printing. If you prefer digital templates, Whole Circle Studio offers bonus videos and digital files on their website to help you get started.
How much fabric do I need for a full quilt?
Fabric yardage depends on the finished size of your quilt and the scale of the constellation blocks. For a standard twin-size quilt, you will typically need about 2.5 to 3 yards of background fabric and 1-2 yards of print fabrics, depending on your color choices. The pattern provides a detailed fabric calculator to help you estimate exact amounts based on your chosen layout. Always buy a little extra in case of cutting errors or future repairs.
Can I change the layout of the blocks?
Yes, the Starry Signs pattern is designed with flexibility in mind. You can arrange the constellation blocks in a traditional grid, staggered layout, or even create a sashing effect with solid fabric strips. The pattern instructions include multiple layout options to suit different quilt sizes and personal styles. You can also mix and match different constellation sizes to create a more dynamic, asymmetrical design.
No comments yet. Be the first to share your thoughts!